
Shopify AI Support Integration
Shopify AI support integration in 4 steps: connect your store, set data access, verify customer identity, test an order lookup. Order tracking and returns included.
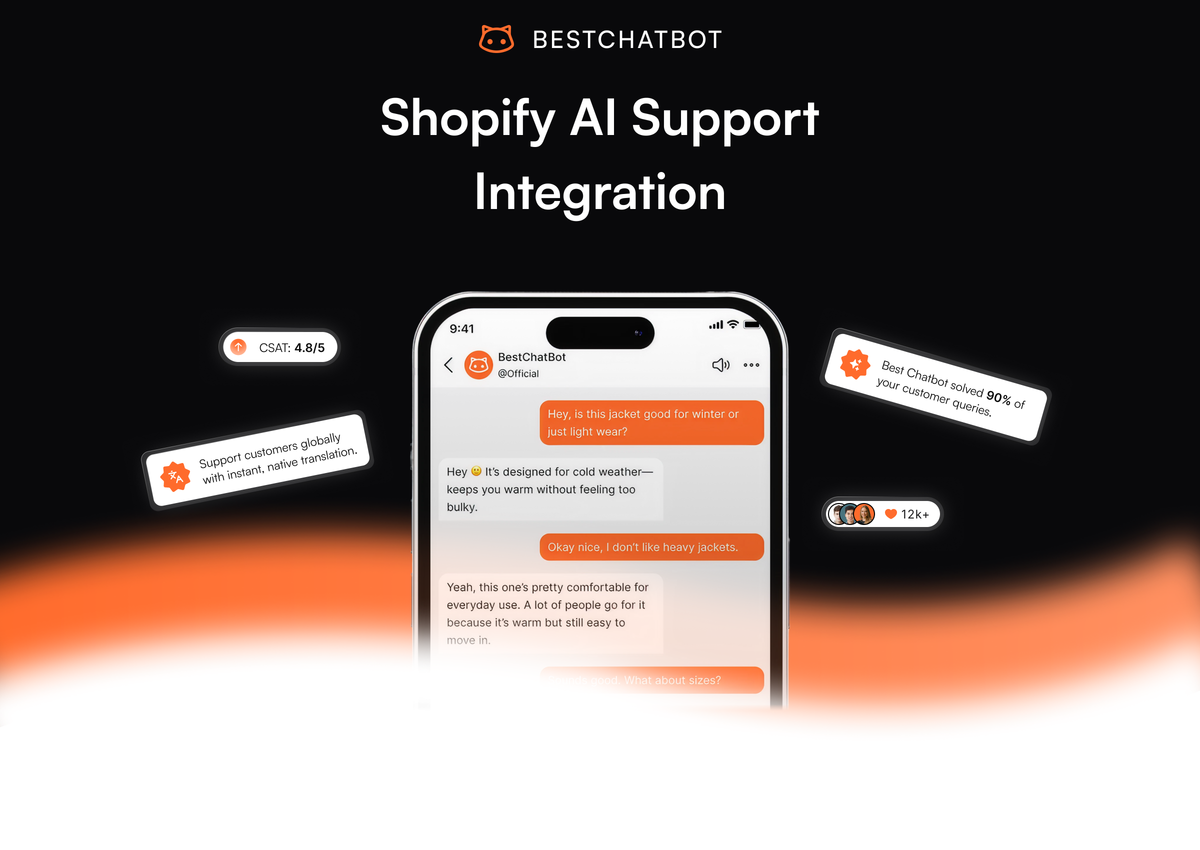
A Shopify AI support integration connects the support widget to your store so it can answer order-specific questions with real data instead of generic policy. Once connected, the widget can look up an order's status, fetch tracking details, surface product information from the catalog, and start a return, all inside the chat and all for the specific customer asking. This page covers what the connection enables, the 4-step setup, and how to verify it works with a real order.
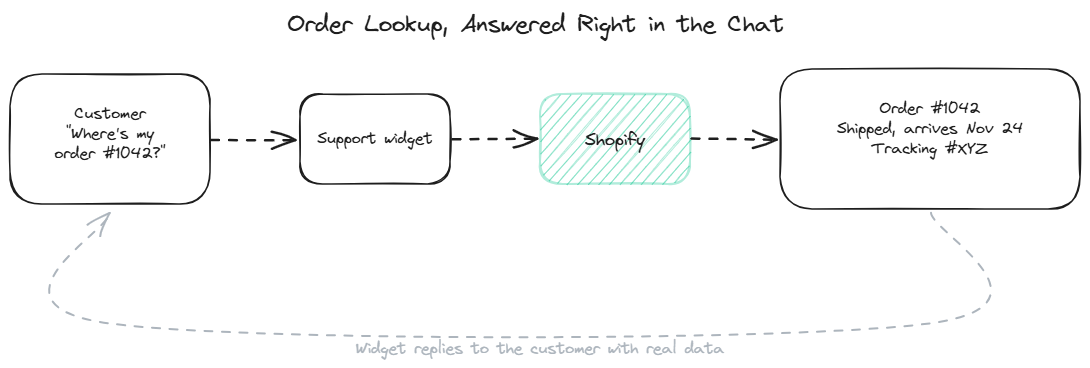
What the Shopify connection enables
A widget connected to Shopify handles a category of question that a docs-only bot cannot touch: anything specific to a customer's order or to your live catalog. Four operations cover most of the value.
Order status lookup answers the highest-volume question in ecommerce support, "where is my order?" The widget pulls the order by number or by the authenticated customer's account, reads the fulfillment status and tracking, and tells the customer exactly where their package is. The order tracking page covers the WISMO use case in product depth.
Product information retrieval answers pre-purchase and post-purchase questions about specific items: availability, variants, sizing, shipping estimates. The widget reads from your live catalog rather than from a static doc that goes stale every time you change inventory.
Return initiation starts the return flow for eligible orders, checking the return window against your policy and either processing the return or routing it to a human for the cases that need review.
Customer order history gives the widget context about who it is talking to: a repeat customer with 12 orders gets different handling than a first-time buyer, and the widget can reference past orders when relevant.
The combination turns the widget from a policy-quoting bot into one that resolves the actual transactional questions ecommerce stores get all day. For the broader commercial picture of this use case, the Shopify AI support page covers the store-owner perspective.
Step 1: Connect your Shopify store
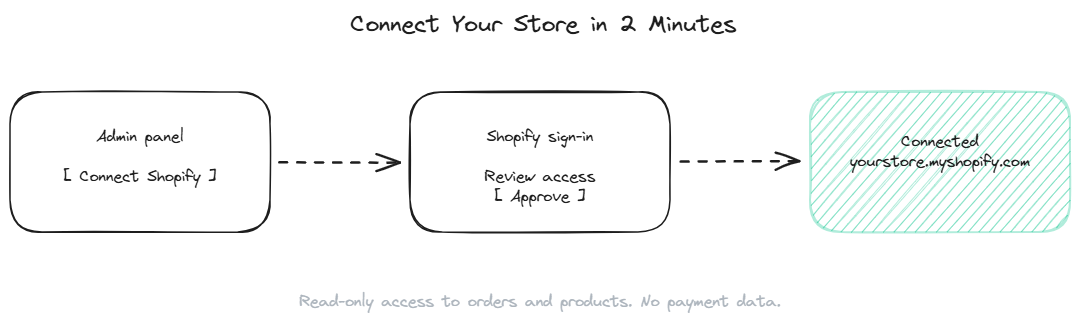
In the admin panel, find Shopify in the available connections and click "Connect." This opens a Shopify OAuth flow in a pop-up. Log in to your Shopify admin if you are not already, review the permissions the widget is requesting, and approve.
The OAuth flow grants the widget scoped access to your store. The permissions requested are read access to orders, read access to products, and (if you enable returns) write access to the returns endpoint. The widget does not request access to payment methods, customer payment details, or store settings, because it does not need them.
After approval, the connection shows as active in the admin with your store's domain confirmed. The whole flow takes about 2 minutes. If you run multiple Shopify stores, repeat the connection for each one and the widget will route lookups to the correct store based on configuration.
Step 2: Configure data access and actions
Once connected, decide what the widget is allowed to do. The defaults are conservative: read-only access to orders and products, no write actions enabled.
For order status and product questions, the read-only defaults are sufficient. The widget can look up and report, but cannot change anything. Most stores start here.
For return initiation, enable the returns write action explicitly. When enabled, configure the boundaries: the return window in days, which product categories are returnable, and what value threshold (if any) routes a return to human review instead of auto-processing. Returns above the threshold or outside the window get handed to a human via ticket rather than processed automatically.
A consideration worth thinking through: how much you want the widget to do versus surface. Some stores prefer the widget to look up an order and then hand off to the customer's account page for any action. Others prefer the widget to handle the full flow in chat. Both are valid; the choice depends on how much you trust the automation and how complex your return rules are.
Step 3: Set up customer identity verification
The widget should only show a customer their own order data, never someone else's. This requires verifying who the customer is before any lookup that returns personal data.
Two patterns work. The first is order-number-plus-email verification: the customer provides their order number and the email on the order, and the widget confirms the match before showing details. This works for logged-out visitors and is the lower-friction option for stores where most traffic is not logged in.
The second is JWT-based authentication for logged-in customers. When a customer is logged into your Shopify storefront, your site passes a signed token to the widget identifying the customer. The widget can then look up that customer's orders without asking for the order number, because it already knows who they are. This is the smoother experience and the right choice for stores with significant logged-in traffic.
Without identity verification, the widget can still answer general questions (shipping policy, return policy, product information) but should not return order-specific data. Configure at least one verification pattern before enabling order lookups.
Step 4: Test with a real order
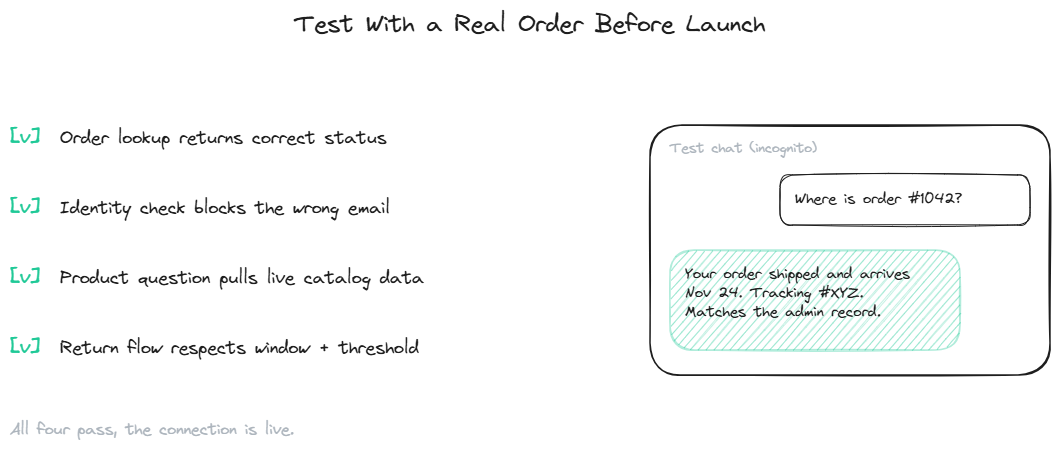
Open the widget on your store in an incognito window. Run through 4 tests.
Test an order lookup with a real order number and the correct email. The widget should return the accurate status, fulfillment state, and tracking. Verify the data matches what you see in the Shopify admin for that order.
Test the identity check with a real order number and the wrong email. The widget should refuse to show the order details. If it shows them anyway, the verification is misconfigured and must be fixed before launch.
Test a product question about a real item. The widget should pull live catalog data (price, availability, variants) rather than a stale or generic answer.
If returns are enabled, test the return flow with an order inside the window and one outside it. The in-window order should proceed; the out-of-window order should route to human review per your configuration.
Once all 4 tests pass, the connection is live. BestChatBot's admin includes a connection diagnostic that runs these checks and flags any misconfiguration before you go live. For pricing details on plans that include the Shopify connection, see plans.
FAQ
- Does the widget work with Shopify Plus? Yes. The connection works across Shopify plans including Plus. Plus-specific features like Shopify Functions or custom checkout extensions may require additional configuration, but the core order, product, and return operations work the same.
- Can the widget access customer data it should not? No, when identity verification is configured. The widget only returns order data after confirming the requester is the order owner, either through order-number-plus-email matching or JWT authentication. Read access is scoped to orders and products; the widget never sees payment details.
- What happens during a Shopify outage? The widget detects the failure and falls back. It tells the customer that order lookups are temporarily unavailable and offers a fallback (a support ticket or a direct link to the customer's account page). General questions answered from the knowledge base continue to work because they do not depend on the Shopify connection.
- Does this work with headless Shopify setups? Yes. The connection talks to Shopify's backend through the API, independent of how your storefront is rendered. Headless setups using the Storefront API or a custom frontend work the same way; the widget install on the frontend follows the custom-site path.
How current is the order data? Real-time. The widget queries Shopify at the moment of the question, so the status it reports is the current status, not a cached or synced version. This is different from knowledge base content, which syncs on a schedule.
Not sure which tool to connect? See our guide on which Shopify AI chatbot to pick.