
Website Widget Integration
Website widget integration in 4 steps: grab the snippet, paste it on your site, configure auth and domains, verify the install. Platform-specific paths included.
Website widget integration is the technical step that puts the AI support chatbot on your site. It takes 10 to 20 minutes for most platforms and is the only required setup before the widget is live. The work splits into 4 steps: get the snippet from your admin, paste it on your site, configure domain restrictions and authenticated user passing, and verify the install with a test conversation. This page walks through each step, the platform-specific paths for WordPress, Shopify, Webflow, Ghost, and custom sites, and the common mistakes that produce a widget that loads but does not work.
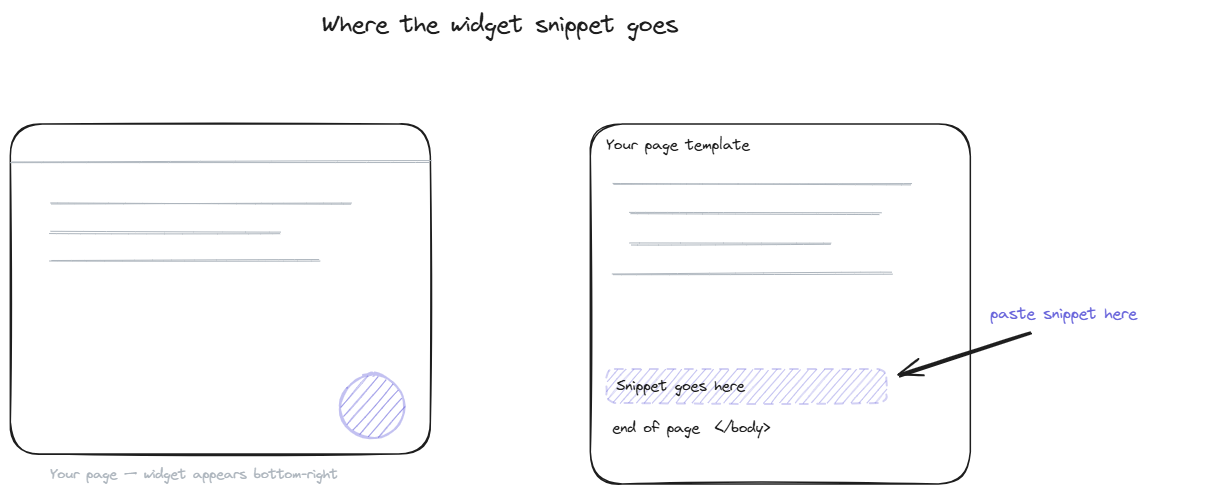
What the widget needs from your site
Before pasting any code, confirm 3 things about your site.
The site has a way to add a JavaScript snippet before the closing </body> tag. Almost every web platform supports this; most have a dedicated "code injection" or "custom HTML" field for it. The exception is platforms that lock down code injection entirely, which is rare but worth checking.
The site loads over HTTPS, not HTTP. The widget will refuse to load on insecure connections in modern browsers, which means any site still on HTTP needs to migrate before installing the widget.
If you want the widget to handle authenticated users (looking up their orders, their subscription, their support history), your site needs to be able to generate a JWT token at login time and pass it to the widget. This is a development task but not a difficult one; the AI web widget page covers the auth side in detail from the product perspective.
With those 3 prerequisites confirmed, the install proceeds.
Step 1: Get the embed snippet
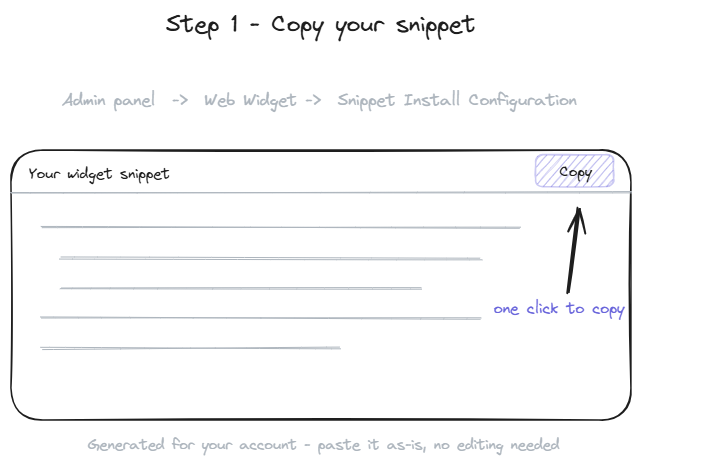
In the admin panel, find the install section for the web widget. The system generates a snippet specific to your workspace, looking roughly like this:
<script
  src="https://widget.bestchatbot.io/widget/v1/chat.js"
  defer data-api-key="YOUR_API_KEY">
</script>
The workspace ID is unique to your account. Do not share it publicly, but understand that it appears in your site's HTML once installed, so it is not strictly secret. Security comes from the domain restrictions configured separately, not from the workspace ID being hidden.
Copy the snippet. The next step depends on your platform.
Step 2: Paste it on your site
The placement target is the same on every platform: before the closing </body> tag on every page where chat should appear. How you get there differs.
- WordPress. Install the BestChatBot plugin from the WordPress plugin directory, paste the workspace ID into the plugin settings, and the plugin handles snippet placement automatically. For sites without the plugin, use a code injection plugin (Insert Headers and Footers, Code Snippets) or paste the snippet into your theme's
footer.phpbefore</body>. - Shopify. Open Online Store → Themes → Edit Code, find
theme.liquid, scroll to just before</body>, paste the snippet, save. The widget will appear on every page of the storefront. For checkout pages specifically, additional setup is needed; consult the Shopify-specific install path in the admin. - Webflow. Open Project Settings → Custom Code → Footer Code, paste the snippet there, save and publish. The widget loads on every page.
- Wix. Use the Custom Code feature under Settings → Custom Code. Add the snippet, set Place Code to "Body - end," save. Note: Wix's free plan has limited Custom Code support; the paid plans support it fully.
- Ghost. Open Settings → Code Injection, paste the snippet into the Site Footer field, save. The widget appears on every page of the site, including blog posts.
- Custom or static sites. Edit your HTML template or layout file directly. Paste the snippet before the closing
</body>tag in the master layout. If your site uses a static site generator (Hugo, Jekyll, Eleventy), the snippet goes into the layout partial that renders on every page.
The snippet placement is identical across platforms; only the path to find the right field differs.
Step 3: Configure auth and domain restrictions
Once the snippet is on the site, configure 2 things in the admin to harden the install.
Allowed domains. Restrict the workspace to your actual domains so the widget cannot be embedded on third-party sites pretending to be you. List your production domain, your staging domain if you want the widget there too, and your local development domain (localhost) for testing. Requests from any other domain will be rejected.
Authenticated user passing. If your site has logged-in users and you want the widget to look up their order history, subscription status, or support history, configure JWT-based identity passing. The flow: your site backend signs a JWT containing the user's ID and any relevant metadata, your frontend passes that JWT to the widget through a JS call, and the widget includes it in every request to the backend. This prevents impersonation and unlocks the personalized features.
Without auth passing, the widget still works but can only handle general questions, not account-specific ones. Most B2C sites start without auth and add it later when the personalization use cases become important. Most B2B sites configure auth on day 1.
Step 4: Verify the install
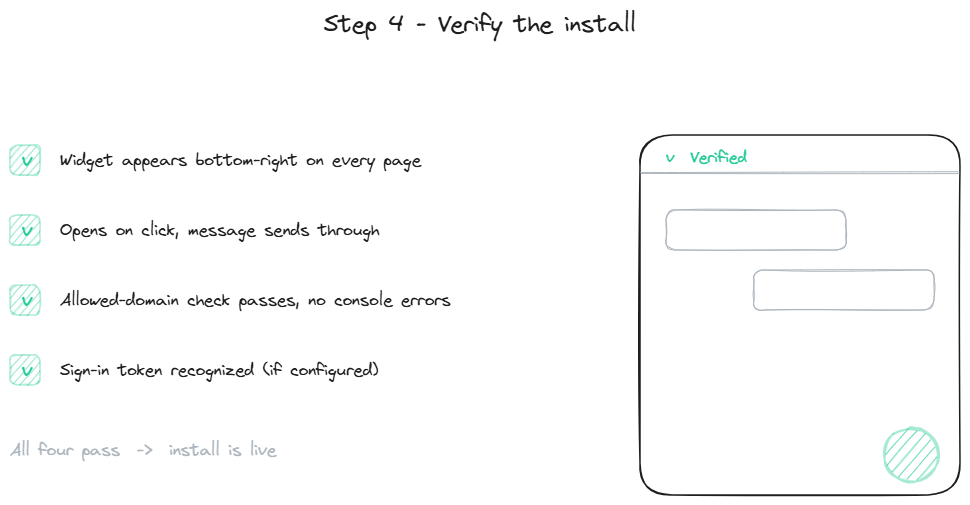
Open your site in an incognito or private browser window. The widget should appear in the bottom-right corner within 2 seconds of page load. Click it. Send a test message. Verify a response comes back.
If the widget does not appear, the most common causes are: snippet pasted in the wrong location (it must be before </body>, not in <head>), workspace ID typo, domain not added to the allowed list, or a content security policy blocking the script source.
Open the browser dev tools console and look for errors prefixed with BestChatBot. The error messages indicate which of the 4 causes is at play and how to fix it.
If you configured auth passing, log in to your site and verify the widget receives the JWT correctly. The widget admin shows the identity status for the current session; if it says "anonymous" when you are logged in, the JWT is not being passed correctly.
Once verification passes, the install is live. For pricing details on the plan tier that fits your install, see plans.
FAQ
- Can the widget appear on only some pages? Yes. The snippet placement determines where the widget loads, but you can also configure visibility rules in the admin to show or hide the widget by URL pattern. Common patterns include hiding it on legal pages (privacy, terms) and on the checkout flow for ecommerce stores.
- Does the snippet slow down my site? The script loads asynchronously, which means it does not block the rest of the page from rendering. Initial widget load adds 50 to 150ms to first paint typically, but the perceived performance impact is near zero because the widget renders after the main content.
- What if my site is behind a paywall or login wall? The widget works the same way. It loads on every page where the snippet is present, including pages behind authentication. The auth passing flow described in Step 3 handles the user identity in those cases.
- Can I customize the widget appearance after install? Yes. Position, colors, fonts, avatar, opening message, and triggers are all configurable in the admin without changing the snippet. The snippet only handles loading; appearance settings live server-side and update without re-deploying.
- How do I remove the widget? Delete the snippet from your site. The widget disappears immediately on next page load. The admin retains the workspace data, so you can re-install later by pasting the snippet back.