Calendly Integration: Scheduling for Your Support Widget
Set up Calendly so your support widget shows open times and books meetings in chat, with verified identity. Four steps, no double bookings.
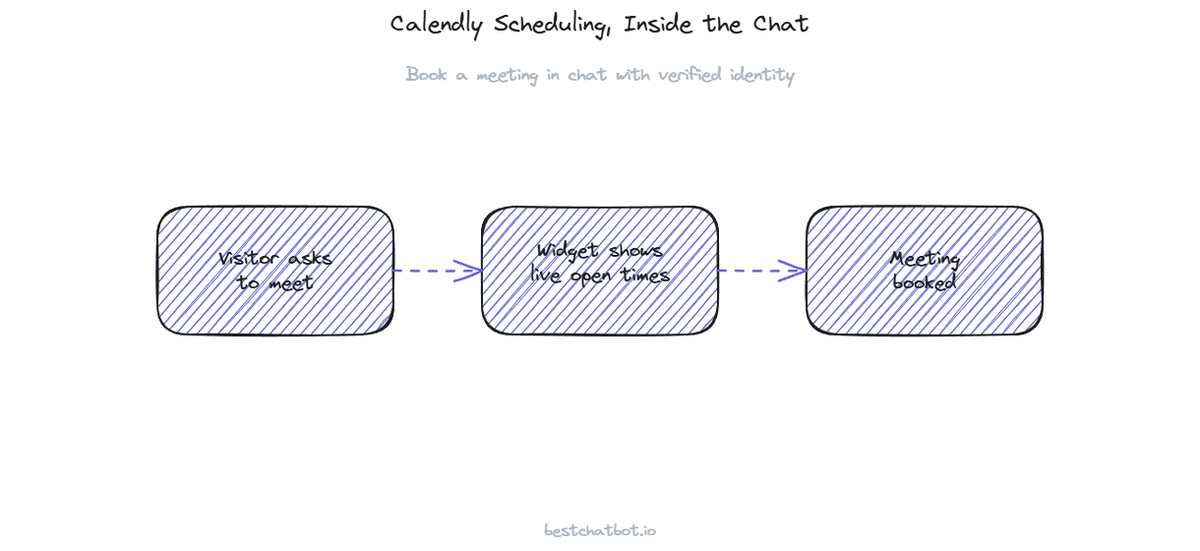
Here is the short version. Connecting your support widget to Calendly takes four steps: link the account, pick which event types the widget can offer, turn on identity verification, then test a real booking. After that, a visitor who asks "can I talk to someone next week" gets live open times and books a slot without leaving the chat.
A widget wired to Calendly answers a question that a docs-only bot cannot: "when can I actually meet you, and can you put it on the calendar right now". The assistant reads your real availability at the moment of the question, offers the open slots, and writes the booking back to Calendly. No back-and-forth email, no "let me check and get back to you", no stale times pulled from a cached page.
This page walks through what the connection does, the four setup steps, and the rules that keep bookings safe. One scheduling tool connects at a time, so this is the Calendly path. If your team runs on the other supported calendar instead, the Cal.com connection follows the same shape.
What the Calendly connection enables
We built the scheduling action around one idea: the widget should never guess at a time it cannot confirm. Once Calendly is linked, the assistant can do three concrete things inside the chat.
It reads your live availability. When a visitor asks about meeting, the widget queries Calendly for the open slots on the event type you allow, then shows real times in the visitor's wording ("Tuesday at 2pm", "Thursday morning"). The times come from Calendly at the moment of the question, so a slot that filled five minutes ago is already gone from the list.
It books the slot. The visitor picks a time, the widget creates the event in Calendly, and Calendly sends its normal confirmation and reminder emails. The booking lands in your real calendar the same as one made on your Calendly page.
It pins the booking to the right person. The meeting gets created under the verified visitor's name and email, not a value the visitor typed mid-conversation. That detail matters more than it looks, and the identity step below covers why.
Scheduling actions run on the Pro and Business plans. On Free and Starter the widget still answers questions from your knowledge base, it just does not execute the booking. Think of grounded answers as the floor and actions as the paid layer on top.
Step 1: Connect your Calendly account
Open the connections panel in your BestChatBot dashboard and choose Calendly. You authorize through Calendly's own sign-in screen, the standard consent flow you have seen on other tools. You approve the access, Calendly hands back a secure token, and the connection shows as active.
A note on credentials, because people ask. BestChatBot does not keep your Calendly password or token in its own database. A specialized credential provider stores the token encrypted and refreshes it when it expires, so the connection keeps working without anyone re-authorizing every few weeks. The assistant calls Calendly through that secured layer, never with raw secrets sitting in the app.
One calendar connects per workspace. The product supports either Calendly or Cal.com for scheduling, not both at once, so the assistant always knows exactly which account holds the truth about your availability. Pick the one your team already lives in.
Step 2: Choose which event types the widget can offer
You probably do not want the widget offering every event type on your Calendly account. The internal 1:1 sync, the personal block, the 90-minute deep session you only run for enterprise deals, none of those belong in a public chat. So the second step is a deliberate allow-list.
In the connection settings you select the specific Calendly event types the assistant may book. A common setup is a single "Talk to us" or "Book a demo" event, 30 minutes, shown to anyone who asks about meeting. You can expose more than one and let the assistant pick based on what the visitor wants, but starting narrow keeps the behavior predictable.
This is also where grounding meets action. The assistant only ever offers times that exist inside the event types you allowed. It cannot invent a slot, cannot offer a meeting type you hid, and cannot book outside the window Calendly says is open. If a visitor asks for something the allow-list does not cover, the widget says so and falls back to answering from your knowledge base or creating a ticket, rather than forcing a booking that should not happen.
Step 3: Turn on identity verification
Booking a meeting writes data into your calendar under someone's name, so the widget needs to know who that someone really is. This is the part that separates a real scheduling action from a form that anyone can spoof.
Customer-specific actions require a verified visitor identity. Your site signs a token (JWT) for the logged-in visitor, the widget reads the verified name and email from that token, and the booking gets created with those pinned values. A visitor cannot type a different email into the chat and have the meeting booked under it, because the assistant uses the identity from the token, not the free text. We pin email and name from the verified identity for every action, scheduling included.
What happens to an anonymous visitor? They are not silently downgraded into a half-broken booking. Without a verified identity the assistant either follows your anonymous path or declines the action and points the visitor to sign in first. There is no quiet middle state where a meeting gets booked against an unverified email. That refusal is the feature, not a bug. A scheduling action you cannot trust is worse than no action at all.
For a deeper look at the identity layer across every action, the appointment booking guide covers the check-book-cancel flow end to end, and the same verification gate applies to a sales call booked from a demo booking chatbot.
Step 4: Test with a real booking
A connection is not live until you have watched it book a real slot. Open the widget on a staging page or your own site, sign in as a test visitor so the identity token is present, and ask to schedule a meeting. Walk the full path.
Check four things. The widget shows real open times that match what your Calendly page shows. The slot you pick actually creates an event in Calendly. The event carries the verified test visitor's name and email, not anything typed in the chat. And Calendly fires its usual confirmation email. When all four line up, the booking flow is trustworthy.
Then test a refusal on purpose. Try to book while signed out, or ask for an event type you did not allow. The widget should decline cleanly and offer the next best step, either answering from your knowledge base or routing you to your team. A scheduling connection that only ever says yes has not been tested, it has just been lucky.
If a question lands fully outside scheduling, say a billing problem the assistant cannot resolve, escalation creates a ticket in your connected support tool (Zendesk or Freshdesk) so a human picks it up from the inbox. The widget does not hand the visitor to a live agent in the chat. It captures the issue, files it, and tells the visitor what happens next.
FAQ
How current are the available times?
Real-time. The widget queries Calendly at the moment the visitor asks, so the open slots it shows are the current ones. A time that filled a minute ago will not appear, and a slot it offers can still be booked. Nothing is synced on a schedule or pulled from a cached page.
Can I use Calendly and Cal.com at the same time?
No. The product connects one scheduling tool per workspace, either Calendly or Cal.com. That single source keeps the assistant honest about your availability, since there is never a question of which calendar holds the real answer. Connect the tool your team already runs on.
Do I need a paid plan to book meetings from chat?
Yes. The scheduling action runs on the Pro and Business plans. Free and Starter still answer visitor questions from your knowledge base, but executing a booking is part of the paid action layer. You can see what each plan includes on the pricing guide.
What stops someone from booking under a fake email?
Identity verification. The meeting is created with the name and email from the visitor's signed token, not from anything typed in the chat. An anonymous or unverified visitor either follows your anonymous path or gets asked to sign in, so a booking never lands against an email the assistant cannot trust.
Does the bot ever double-book a slot?
It works off Calendly's live availability and creates the event through Calendly, so the calendar stays the single authority on what is open. If a slot is taken, the widget does not show it. There is no separate copy of your schedule to drift out of sync.
Get scheduling live
Connecting Calendly turns "I'll check my calendar" into a booked meeting inside the same chat, with the right identity on every event. To see which plans include scheduling actions, take a look at the pricing guide, or browse the full set of support connections to plan what your widget links to next.