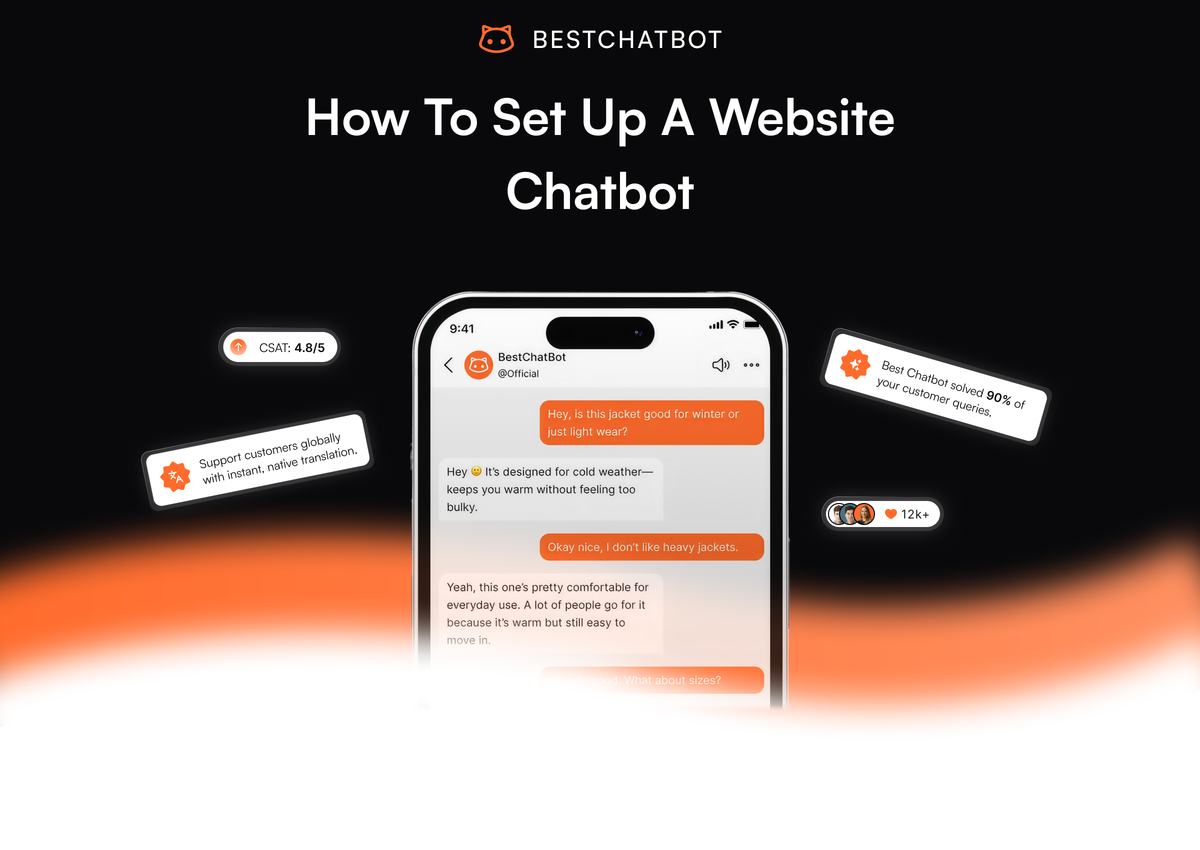
How to Set Up a Website Chatbot
A practical website chatbot setup guide: content audit, knowledge base, embed, testing, and the mistakes that kill 90% of rollouts before they ship.
A website chatbot setup looks deceptively simple on the vendor's marketing page: paste a snippet, point the bot at your help center, go live. The reality is that 90% of bots that fail in the first month fail because the team skipped the boring parts, not because the AI was bad. This guide walks through the full process the way it actually plays out, with the gotchas that cost most teams a week of rework.
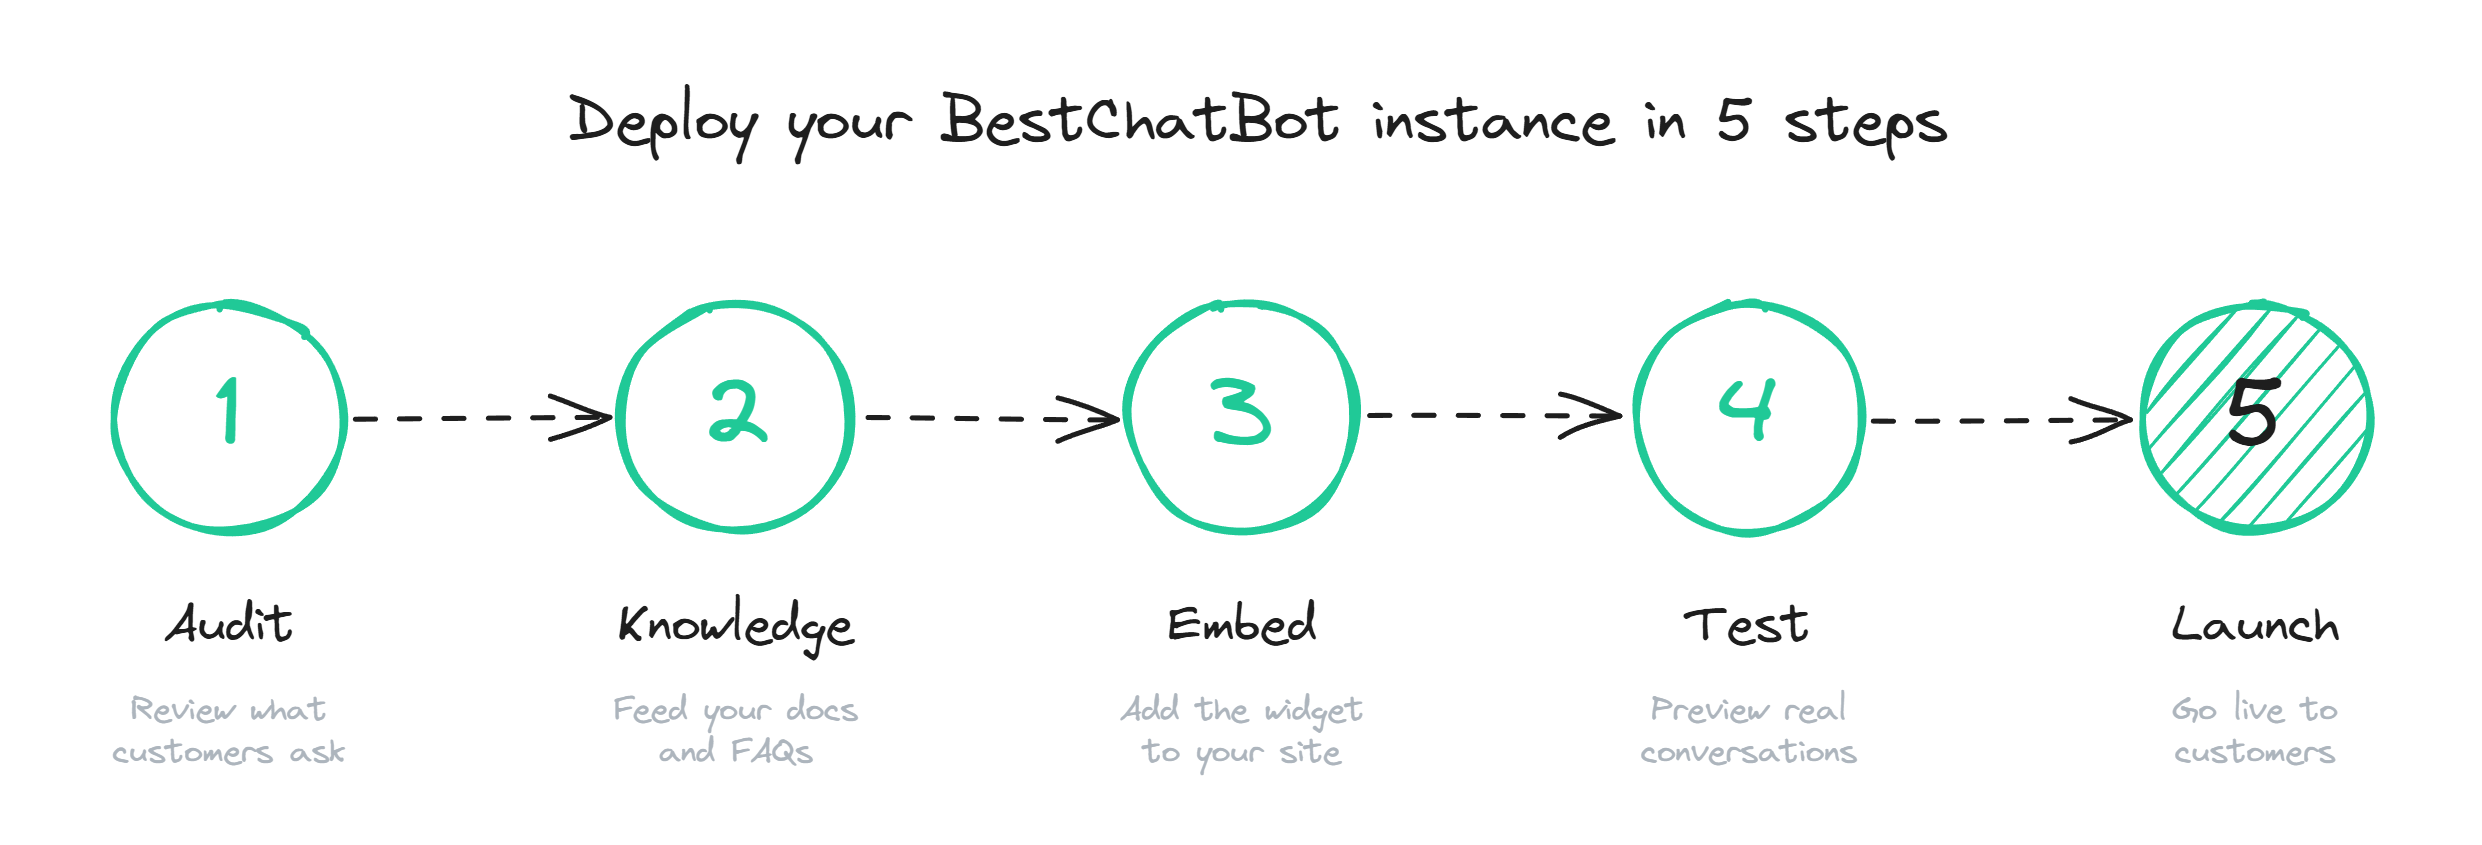
Step 1: Audit the content before touching the tool
Before opening any chatbot dashboard, open your help center. Pull every article, every FAQ, every PDF the support team links to. Look for three things: duplicates that say slightly different things, articles that are over a year old and reference dead features, and pricing or policy pages that contradict what is on the public site.
This is the step every team wants to skip. It is also the single biggest predictor of whether the bot will work. A chatbot trained on contradictory sources will answer with whichever passage the retrieval picks first, which means the same question gets two different answers depending on which document the model surfaced. That destroys trust faster than any other failure mode.
A clean audit produces three buckets: content the bot can use as-is, content that needs a rewrite, and content to delete. Most teams find that 20-30% of their existing docs land in the delete pile, and another 20% need an edit pass. Plan for two days on this step alone.
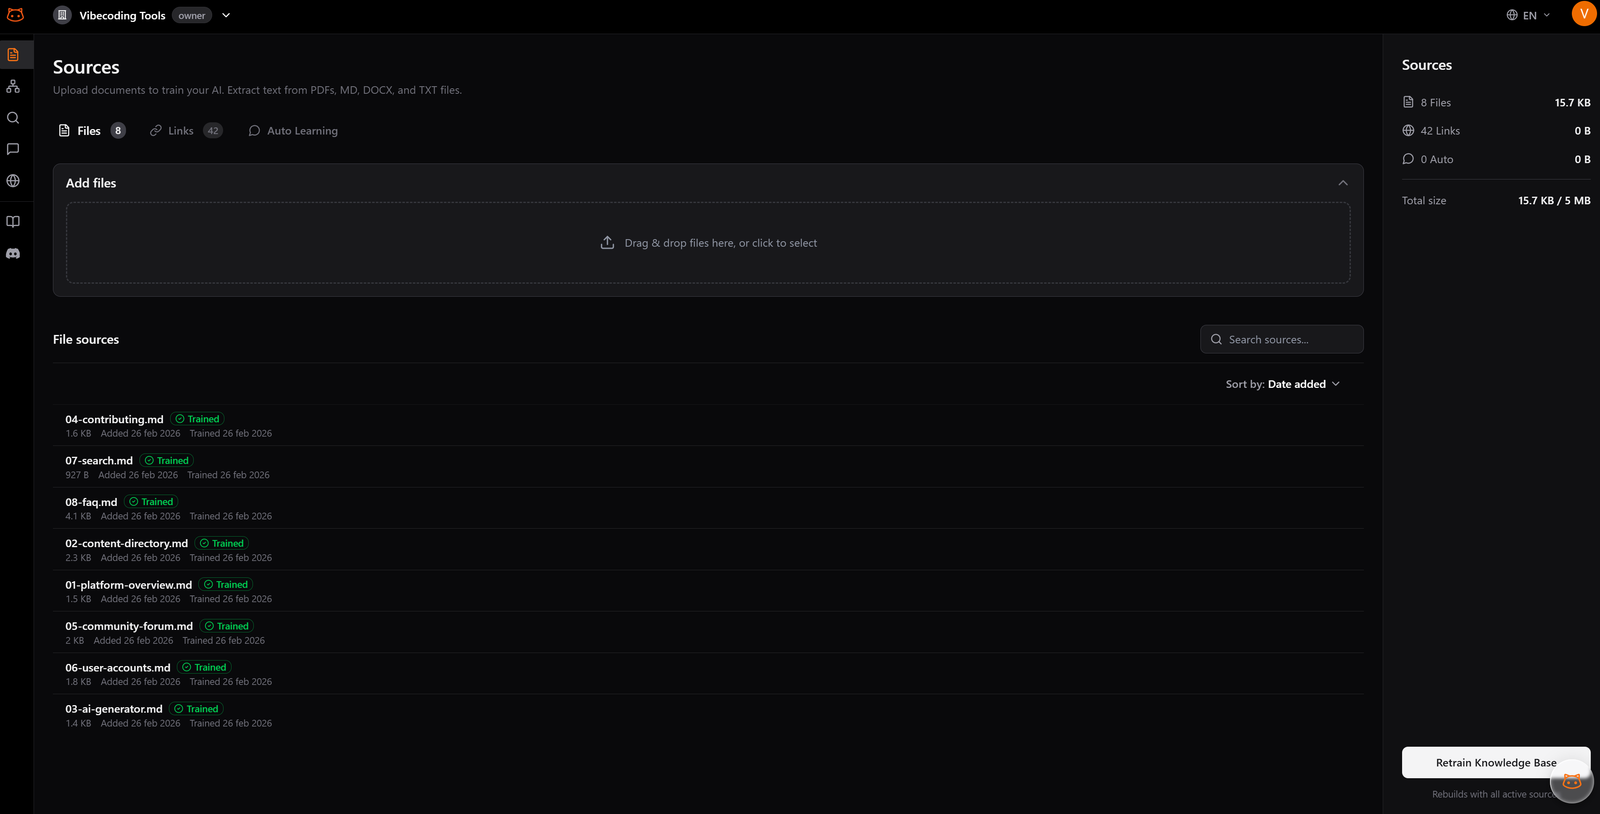
Step 2: Pick your knowledge sources and structure them
Once the content is clean, decide which sources feed the bot. The realistic mix for a SaaS team is: help center articles, product documentation, the public FAQ, and one or two PDFs (pricing tiers, integrations list, anything customers ask about regularly). Avoid feeding the bot internal Notion pages, Slack threads, or anything not written for end users.
Structure matters more than volume. Break long articles into clear sections with descriptive headings, because the retrieval layer pulls passages, not full articles. A 50-article help center with good structure beats a 500-article dump every time.
If your knowledge sits in a help center platform (Zendesk Guide, Intercom Help, HelpScout, a Ghost knowledge base), look for a chatbot vendor that syncs natively or supports URL/sitemap scraping with scheduled refresh. Manual exports go stale within a week and nobody re-uploads them.
Step 3: Train and shape the bot's voice
With the knowledge base in place, this is where the AI chatbot setup gets specific to your tool. Two configuration choices actually matter at this stage:
- Tone and persona. Match the voice of your existing docs. If your help center is plain and direct, do not give the bot a quirky personality. Mismatch reads as fake.
- Scope of answers. Decide what the bot should and should not talk about. A support bot for a SaaS product should not be answering general knowledge questions or going off-topic into competitor comparisons. Keep the bot focused on what your knowledge base actually covers.
The training itself is mostly automatic once the content is loaded. Good systems index your documents and build a knowledge graph in the background. The bot's job is to retrieve the right passage and answer from it; if it cannot find a relevant source, it says so and saves the question for review. The deep version of this step lives in the train your chatbot guide.
Step 4: Install the embed and customize the widget
The technical part of the support bot setup is the easiest part. Most vendors give you a JavaScript snippet that goes before the closing </body> tag on every page where chat should appear. If you run on WordPress, Webflow, Shopify, or Ghost, there is usually a one-click install that drops the snippet in the right place.
Customize four things at minimum. Position (bottom-right is standard for a reason; do not put it bottom-left without a strong reason). Colors that match your site, not the default vendor purple. The opening message, which should be specific to the page if your tool supports it ("Questions about pricing?" on /pricing/ beats "Hi! How can I help?" everywhere). And the avatar, which should be a clear bot icon, not a stock photo of a smiling person, because users feel deceived when they realize they are talking to AI.
The proactive trigger is where most teams hurt themselves. Default behavior on many tools is to pop the widget open within 3 seconds of page load on every page. This raises bounce rates. Set the trigger to fire after 20-30 seconds of engagement, on exit intent, or only on high-value pages like pricing and contact.
Step 5: Test with real questions, not example ones
The instinct here is to type a few obvious questions and call it tested. Resist that. Pull the last 200 support tickets, strip the names, and feed the bot those exact questions. Tag each response: correct, partially correct, wrong, or "I do not know". The honest distribution at this stage is usually 40% correct, 25% partial, 20% wrong, 15% deflected.
That is your starting baseline. The wrong answers point to content gaps or contradictions you missed in Step 1. The partial answers usually mean the retrieval picked the right document but the wrong section, which is fixable by editing the source content. The "I do not know" responses are fine; that is the bot doing what it should, and those questions feed directly into the next round of knowledge base updates.
Bring the support team into this round. They know the questions that come up at 2am, the edge cases the docs do not cover, the wording customers actually use ("my order didn't come" instead of "shipping inquiry"). Their hour of testing saves a month of post-launch firefighting.
Step 6: Soft launch, measure, expand
Do not turn the bot on across the whole site on day one. Pick one page where traffic is meaningful but stakes are lower. The contact page is a good candidate; the pricing page is also fine if you trust the content. Run for one to two weeks. Watch three metrics: resolution rate (how often the bot fully answers the question), CSAT on bot conversations, and the list of questions where the bot said "I do not know".
The "I do not know" list is the most useful artifact you will produce in the first month. Each entry is either a content gap (write the doc) or a question outside the bot's scope (rewrite the source content to clarify). Plan a 30-minute weekly review to triage that list. Teams that do this honestly hit 60-70% resolution by month three. Teams that ignore it stay at 25% forever.
Once the soft launch numbers stabilize, roll the widget across the rest of the site. Keep the weekly review going indefinitely. A chatbot is never finished; it just gets better or worse depending on whether anyone is paying attention.
Common mistakes to avoid
A few patterns show up repeatedly across failed launches. Worth flagging explicitly:
- Treating launch as the end of the project. The bot at week one is not the bot at month three. Without weekly content updates and review of failed answers, performance plateaus or decays.
- Hiding the bot's limits. A bot that pretends to know everything erodes trust within a week. A bot that says "I do not have that answer" earns trust fast.
- Aggressive popups. Auto-open within 3 seconds, every page, every visit. This is an anti-pattern that the data has been clear on for years, and it still ships in default vendor configs.
- Skipping the content audit. The temptation to "just point it at the help center and see what happens" is real. The cost of skipping is also real: a bot that contradicts itself on day one is a bot the support team turns off by week two.
The teams that do website chatbot setup well treat it as a content project with a software component, not the other way around. Get the docs right, set conservative defaults, measure honestly, and the AI part takes care of itself. When you are ready to start, see plans and pick the tier that matches your traffic. BestChatBot includes a supervised autolearning loop that captures the questions the bot could not answer, so the weekly review actually compounds into a smarter bot week over week.
FAQ
- How long does a full website chatbot setup take? One to two weeks for a team with reasonable existing documentation. Half of that is content audit and knowledge base prep, not the technical install. Teams that skip the audit can ship in two days, but they end up redoing it within a month.
- Do I need a developer to install the bot? No, in most cases. The embed is a single JavaScript snippet that platforms like WordPress, Shopify, Webflow, and Ghost accept through a settings panel or a simple plugin. A developer helps if you want custom triggers tied to user behavior or deep connections with your CRM.
- What if I do not have a help center yet? You can still launch with whatever you do have: a FAQ page, product docs, even a few well-written PDFs. The bot will be narrower in scope, but that is fine for a starting point. Build out the knowledge base from the questions the bot cannot answer in the first month.
- How do I know if the bot is working? Track three metrics: resolution rate (target 50%+ at month three), CSAT on bot conversations (target 75%+), and the count of "I do not know" responses (this should shrink week over week if you are reviewing them). Anything else is vanity.
- Can I change the knowledge base after going live? You should. Add new docs as products change, remove anything outdated, edit articles where the bot keeps misquoting them. Most platforms re-index on a schedule (daily or weekly), so changes propagate automatically. Treat the knowledge base as a living thing, not a one-time upload.
A working website chatbot setup is mostly process, not magic. Every step in this guide exists because skipping it has burned someone. Follow the order, do not rush the audit, and the rest holds together.